
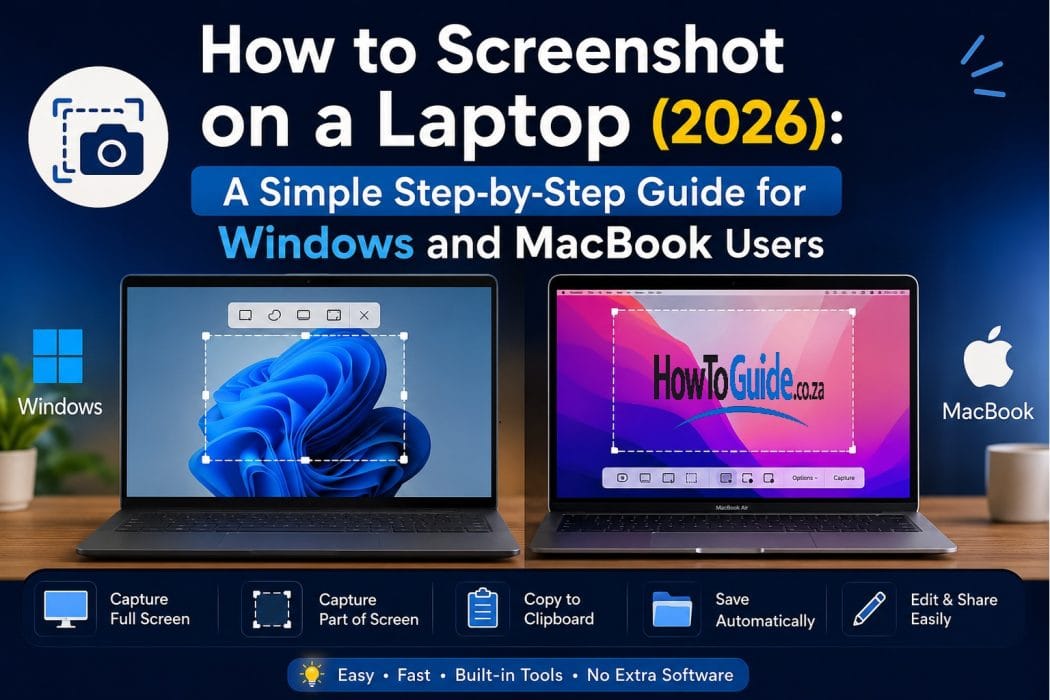
TL;DR – Quick Answer
Need to take a screenshot quickly?
Windows
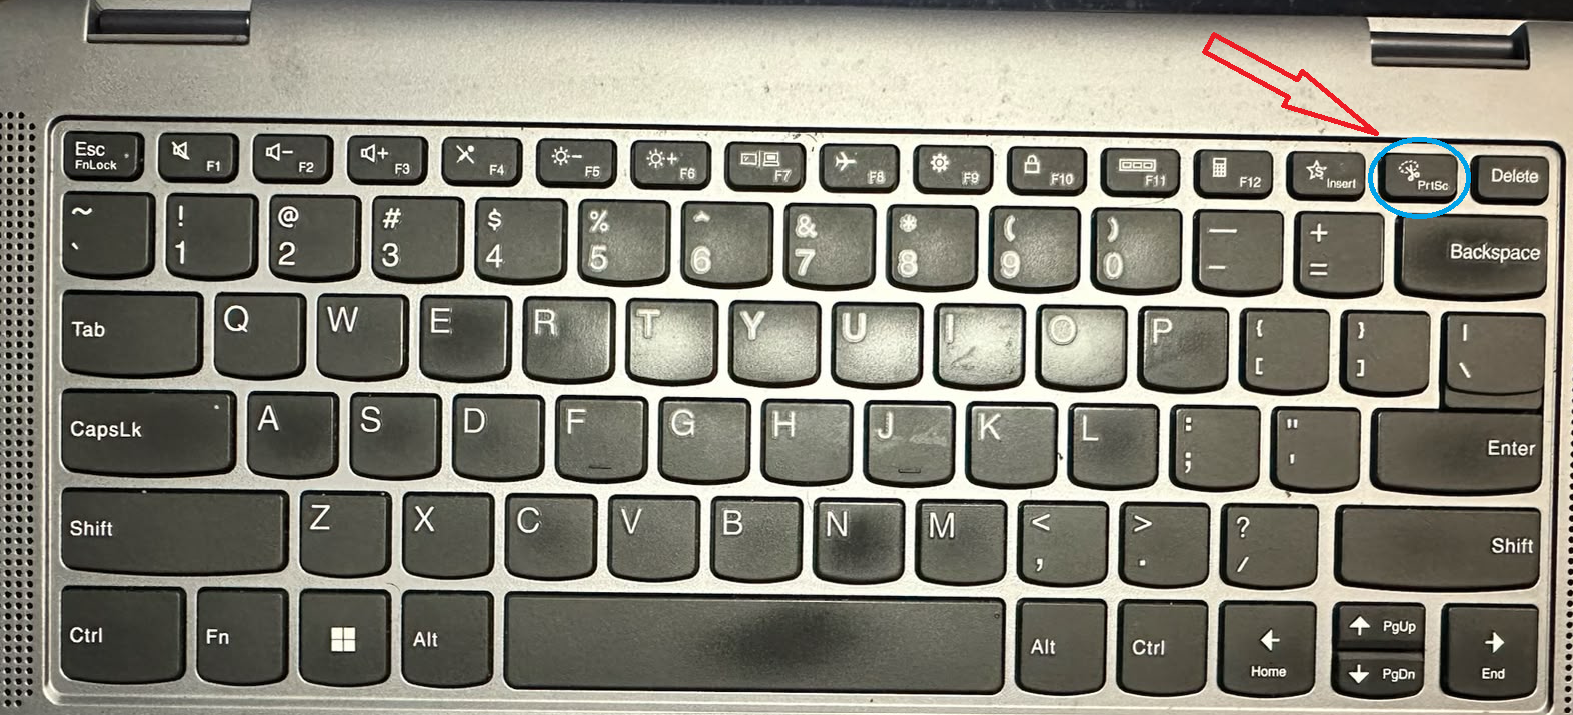
- Entire screen: Press PrtScn (or Fn + PrtScn on some laptops)
- Automatically save screenshot: Press Windows + PrtScn
- Capture part of the screen: Press Windows + Shift + S
- Open Snipping Tool: Search for Snipping Tool in the Start Menu
MacBook
- Entire screen: Press Command (⌘) + Shift + 3
- Part of the screen: Press Command (⌘) + Shift + 4
- Screenshot toolbar: Press Command (⌘) + Shift + 5
Most screenshots are automatically saved in the Pictures > Screenshots folder (Windows) or on the Desktop (Mac), unless you’ve changed the default location.
1. Introduction
Taking a screenshot is one of the most useful computer skills you can learn. Whether you’re saving an important document, sharing an error message with technical support, capturing an online receipt, or saving information for later, screenshots make it quick and easy.
I remember struggling to take screenshots when I first started using a laptop. Whenever I needed to save something on my screen, I would simply grab my phone and take a photo of the laptop display. The pictures often came out blurry, had screen glare, or didn’t look professional. It wasn’t until I discovered that both Windows laptops and MacBooks have built-in screenshot tools that I realised how easy the process actually is. Since then, taking screenshots has become second nature and has saved me a lot of time.
The good news is that every modern laptop already includes built-in screenshot tools. You don’t need to install additional software to capture your screen.
In this guide, you’ll learn how to take screenshots on Windows laptops and Apple MacBooks, where screenshots are saved, how to edit them, and tips for getting the best results.
2. Who This Guide Is For
This guide is ideal for:
- Windows 10 users
- Windows 11 users
- Apple MacBook users
- Students
- Office workers
- Remote employees
- Teachers
- IT support beginners
- Anyone who wants to capture information displayed on their laptop screen
No technical experience is required.
3. Requirements
Before you begin, you’ll need:
- A Windows laptop or Apple MacBook
- A working keyboard
- Windows 10, Windows 11, or macOS
- Built-in screenshot tools (already included)
- Optional image editor if you want to annotate screenshots
Windows users can use:
- Print Screen (PrtScn)
- Snipping Tool
- Snip & Sketch (Windows 10)
- Photos App
- Paint
Mac users can use:
- Screenshot Toolbar
- Preview
- Markup Tools
4. Step-by-Step Guide
Method 1: Take a Full Screenshot on Windows
Step 1
Locate the Print Screen (PrtScn) key on your keyboard.
It is usually near the top-right corner.
Step 2
Press:
PrtScn
(Some laptops require Fn + PrtScn.)
Step 3
The screenshot is copied to your clipboard.
Step 4
Open Paint, Microsoft Word, or another application.
Step 5
Press:
Ctrl + V
Step 6
Save your screenshot.
Method 2: Automatically Save a Screenshot (Windows)
Step 1
Press:
Windows + PrtScn
Step 2
Your screen will briefly dim.
Step 3
Open:
Pictures → Screenshots
Your screenshot will already be saved there.
Method 3: Capture Only Part of the Screen (Windows)
Step 1
Press:
Windows + Shift + S
Step 2
Choose one of the capture modes:
- Rectangle
- Free-form
- Window
- Full Screen
Step 3
Select the area you want.
Step 4
Click the notification to edit or save your screenshot.
Method 4: Use the Snipping Tool (Windows)
Step 1
Open the Start Menu.
Step 2
Search for:
Snipping Tool
Step 3
Click New.
Step 4
Select the part of the screen you want.
Step 5
Edit if necessary.
Step 6
Save the screenshot.
Method 5: Capture the Entire Screen (MacBook)
Step 1
Press:
Command (⌘) + Shift + 3
Step 2
The screenshot is automatically saved to your Desktop (unless you’ve changed the location).
Method 6: Capture Part of the Screen (MacBook)
Step 1
Press:
Command (⌘) + Shift + 4
Step 2
Your cursor changes into crosshairs.
Step 3
Drag over the area you want.
Step 4
Release your mouse or trackpad.
The screenshot is automatically saved.
Method 7: Capture a Window (MacBook)
Step 1
Press:
Command + Shift + 4
Step 2
Press the Spacebar.
Step 3
Click the window you want.
The screenshot saves automatically.
Method 8: Open the Screenshot Toolbar (MacBook)
Step 1
Press:
Command + Shift + 5
Step 2
Choose to capture:
- Entire screen
- Selected window
- Selected portion
You can also:
- Record your screen
- Change save location
- Set timers
- Show or hide the mouse pointer
5. My Experience or Practical Insights
When I first started using laptops, I thought taking a photo of the screen with my phone was the easiest option. While it worked in a pinch, the images often had glare, poor quality, and were difficult to read.
Learning the built-in screenshot shortcuts completely changed the way I worked. Whether I needed to report an error, save online receipts, or share instructions with someone, screenshots became faster, clearer, and much more professional.
One tip I’ve found especially useful is using Windows + Shift + S on Windows and Command + Shift + 4 on a Mac. These shortcuts let you capture only the part of the screen you need, which keeps screenshots clean and easy to understand.
6. Common Mistakes to Avoid
Avoid these common mistakes:
- Pressing the wrong keyboard shortcut.
- Forgetting to use Fn + PrtScn on some laptops.
- Forgetting to save clipboard screenshots.
- Sharing screenshots with personal information visible.
- Saving screenshots as low-quality images.
- Cropping away important context.
- Capturing the wrong monitor when using multiple displays.
- Forgetting where screenshots are automatically saved.
7. Troubleshooting
My Print Screen key doesn’t work.
Try:
Fn + PrtScn
Some laptop manufacturers require the Function key.
I can’t find my screenshot.
Windows:
Check:
Pictures → Screenshots
Mac:
Look on your Desktop or the folder selected in Screenshot Toolbar settings.
My screenshot only copied to the clipboard.
Paste it into Paint or another application using:
Ctrl + V
Then save it.
My screenshot is blurry.
Always save screenshots as PNG instead of JPEG when possible.
I need a scrolling screenshot.
Windows and macOS don’t include a built-in scrolling screenshot tool for every application. Some browsers and third-party apps provide this feature.
8. Helpful Tips and Best Practices
- Learn the keyboard shortcuts for your operating system.
- Use PNG format for the clearest text.
- Crop unnecessary parts of the image.
- Highlight important sections before sharing.
- Blur sensitive information.
- Close unnecessary applications before capturing.
- Organise screenshots into folders.
- Rename screenshots to make them easier to find later.
- Keep your operating system updated to access the latest screenshot features.
9. Frequently Asked Questions
1. Can I take a screenshot without using the keyboard?
Yes.
Windows users can use the Snipping Tool.
Mac users can use the Screenshot Toolbar.
2. Why isn’t Print Screen working?
Some laptops require:
Fn + PrtScn
Also check whether another application has reassigned the shortcut.
3. Where are Windows screenshots saved?
If you use:
Windows + PrtScn
They’re usually saved in:
Pictures → Screenshots
4. Can I screenshot only one window?
Yes.
Windows:
Alt + PrtScn
Mac:
Command + Shift + 4, then press Spacebar.
5. How do I take a scrolling screenshot?
Most browsers and some third-party applications offer scrolling screenshots, as Windows and macOS don’t provide this feature for every app.
6. Can I edit screenshots immediately?
Yes.
Windows offers the Snipping Tool editor.
Mac uses Preview and Markup tools.
7. Which image format is best?
PNG provides the highest quality for screenshots containing text.
8. Can I record my screen instead of taking a screenshot?
Yes.
Mac’s Screenshot Toolbar includes screen recording.
Windows also provides screen recording options through applications like Xbox Game Bar.
9. Why is my screenshot black?
Some streaming services and protected content block screenshots for copyright and security reasons.
10. Can I change where screenshots are saved?
Yes.
Both Windows and macOS allow you to choose or change the default save location.
10. Official Resources and References
For official information, visit:
- Microsoft Support
- Windows Snipping Tool documentation
- Apple Support
- Apple macOS User Guide
These resources provide the latest keyboard shortcuts and screenshot features for Windows and macOS.
11. Conclusion
Taking a screenshot is a simple but valuable skill that can save you time whether you’re working, studying, shopping online, or helping someone troubleshoot a computer problem.
Windows and macOS both include powerful built-in screenshot tools, so there’s no need to download additional software for everyday use. Once you learn a few keyboard shortcuts, capturing your screen becomes quick and effortless.
If you’re new to screenshots, practise using the different methods a few times. Before long, they’ll become second nature, making it easier to save, share, and organise important information whenever you need it.
12. Disclaimer
This guide is provided for informational purposes only. Keyboard shortcuts and screenshot features may vary depending on your laptop manufacturer, keyboard layout, Windows version, or macOS version. Always keep your operating system updated to ensure you have access to the latest screenshot tools and features.

.
About Pheto M
Pheto M is the founder and guide writer of HowToGuide.co.za, a practical information website created to help people find clear, useful and easy-to-understand guidance on everyday topics.
Pheto started HowToGuide.co.za after noticing a common problem: people often need help with important questions, applications, services and everyday decisions, but the information available online can be confusing, difficult to understand or scattered across different sources.
Pheto has experience and knowledge across several areas, including Business, Information Technology (IT), Education and Relationships. These areas have given her a practical understanding of different challenges people face in their personal, professional and everyday lives.
Today, she dedicates her time to researching, writing and updating practical guides designed to help readers understand information and take the right steps with greater confidence.
Her approach is simple: make complex information simple, confusing processes clear, and difficult situations easier to manage.
Through HowToGuide.co.za, Pheto aims to provide practical, accessible and helpful information that readers can use in their everyday lives.
Pheto values feedback from readers and is committed to continually improving the content on HowToGuide.co.za. If you have a question, suggestion, or would like to get in touch, you can email her at admin@howtoguide.co.za. She personally reviews reader feedback and aims to respond within 48 hours.
How to Check If Someone Is Trying to Hack Your WhatsApp: 2026
August 21, 2026
Reading Time: 10 minutesLearn how to check if someone is trying to hack your WhatsApp. Discover key warning signs, like unexpected verification codes and unfamiliar linked devices, and follow simple steps to secure your account.
How to Use SARS WhatsApp Tax Services in 2026: Step-by-Step Guide
August 8, 2026
Reading Time: 12 minutesLearn how to access SARS tax services on WhatsApp in 2026. Step-by-step guide to check tax numbers, refund status, auto-assessments, and submit documents.
How to Reverse an FNB eWallet Payment on the FNB App (2026)
August 4, 2026
Reading Time: 6 minutesLearn how to reverse an FNB eWallet payment step-by-step using the FNB App, check transaction status, and act fast before funds are redeemed.
How to Cancel a FOX One Subscription on Roku or Youtube (2026): Easy Step-by-Step Guide.
July 26, 2026
Reading Time: 5 minutesNeed to cancel your FOX One subscription? Whether you signed up through Roku, YouTube, or directly, learn the exact step-by-step process to cancel your account, avoid unwanted auto-renewals, and manage your billing hassle-free.
How to Cancel Vodacom Subscriptions (Caller Tunes, Games & Contracts – 2026 Guide)
July 20, 2026
Reading Time: 5 minutesCharged for unknown airtime services? Learn how to cancel subscriptions on Vodacom step-by-step—including WASP content, caller tunes, recurring data bundles, and full contracts
How to Recall an Email in Outlook (2026 Step-by-Step Guide)
July 20, 2026
Reading Time: 6 minutesNeed to unsend an email in Outlook? Here is a step-by-step guide on how to recall an email, when the feature actually works, and what to do if it fails.